
Candy Cane Bark - Free sticker download
It's no surprise that I love Candy Cane bark around this time of the year, and it's a great baking project to do with friends + family. A few weekends ago my younger sister, her friend and I got together and made some candy cane bark for them to give as gifts to friends.
After making the bark, we put them in celophane bags (easily found at craft stores/cooking stores) and tied them shut with a silk ribbon. We labeled each bag with a sticker - done in a candy cane motify! Click here to download the 8.5x11 page template and print on heavy paper and make tags, or print on sticker paper to make stickers!
Step 1: Get Candy Canes. :) I prefer the red + white ones. :)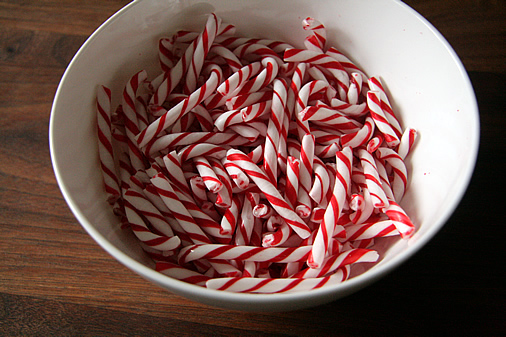
Step 2: Buy White Chocolate. I started with white chippits from the Bulk store (Bulk Barn in Canada) However, do read on, as I wouldn't recommend them.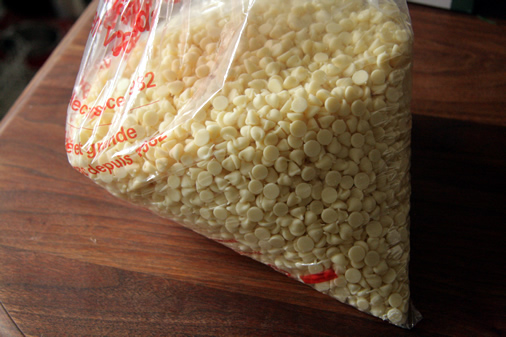
Step 3: Buy Pepermint Flavouring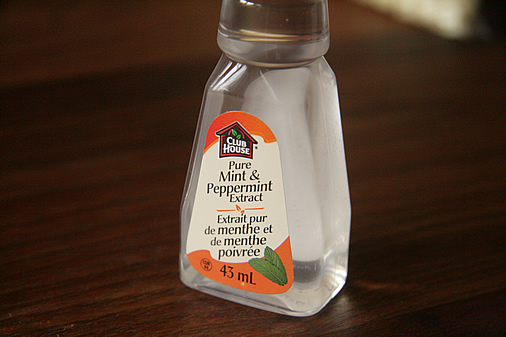
Step 4: Put the candy canes in a zip lock back and go to town! :)
Step 5: Double Broil the Chocolate - I do this for the best consistency (no burning of the chocolate) However, the white chippits, although they look like they are melting, didn't work so well. It turned out like cookie dough batter, and was giving me a panick attack!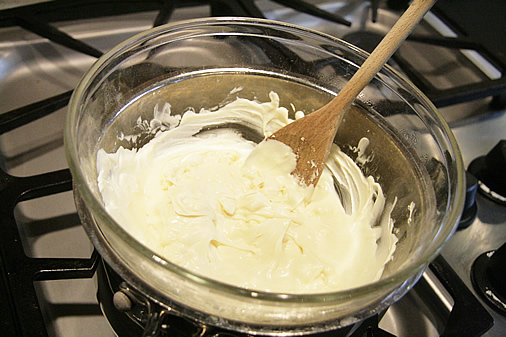
Step 6: Mom saves the day. My Mom ran out and go us Baker's white chocolate while I manned the kitchen. They worked PERFECTLY.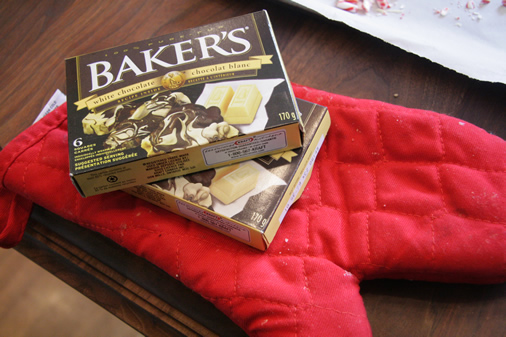
Step 7: Melting a sucsess! It was MUCH runnier and a whole lot better. :) I pour in a little peppermint flavouring at this stage, just to make it that much more flavourful. Add per your taste. :)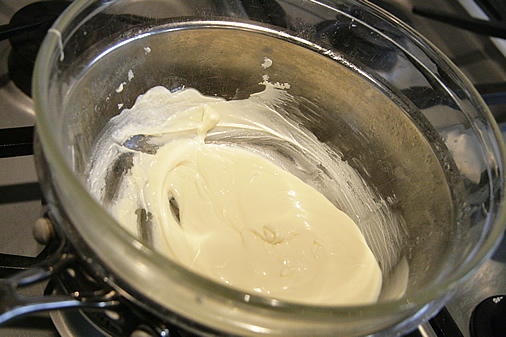
Step 8: Spread the melted chocolate on parchment paper and then sprinkle candy canes on the still warm chocolate. Put in fridge and let cool. I suggest 15-20 minutes.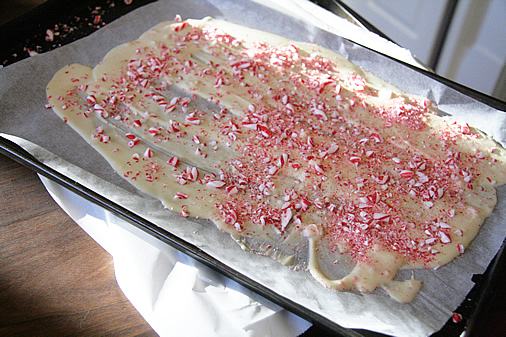
Step 9: When cooled, break apart candy cane and place in bags!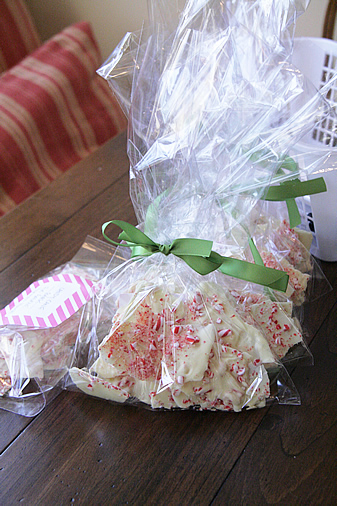
Want your own sticker sheet? Click here to download. :)
Enjoy!!
* Sticker will be available until December 25th. :)
![]()
Thank you!! This is awesome!
ReplyDeleteI wish I had read this sooner because I also bought chippets and it turned out horribly. I finally wised up and bought Baker's White Chocolate... yum!
ReplyDeleteI made the same mistake unfortunately (as you can see). Last year I bought the bakers chocolate, and so I didn't realize it would be so disasterous this year when I switched! I wonder why they don't work?
ReplyDeleteLindsay - again, you're awesome! Thank you for the pictures of the process, and the heads up about not using the chippits. :) We love our Alphabet print(s) by the way .... BEST gifts ever. :)
ReplyDeleteSo delicious!! Yep - chippits suck because (I think) the WAX content in them is too high in comparison to the chocolate! Crazy eh?!
ReplyDeleteReally? That is so interesting that it is a wax content...I'm going to tell my family tonight, as we were all stumped!
ReplyDeleteI could say that I did the chippits first for the purpose of "teaching purposes" for my sister and her friend (what NOT to do) but in reality, it was a disaster! (Thankfully my Mom ran out to grab us the GOOD chocolate). ;)
Thanks for solving the mystery!
I made some for our Christmas parcels that we sent out today and will be making more to give to our neighbours too! Thanks for the download, it will add the perfect touch!
ReplyDeletei'm doing this this weekend! thanks for sharing.
ReplyDeleteYum - thanks for the inspiration!
ReplyDeleteLove the recipe, thanks for sharing!
ReplyDeleteApparently you shouldn't use wooden spoons either - only metal - as the wood absorbs the moisture from your chocolate and can make it freeze up.
ReplyDeleteJust found your blog via the Little Green Notebook. The nightstands are fantastic ... but I'm also a stationery fiend, so I'm in love!! So glad to have found your site.
ReplyDeleteTraci
Love this!
ReplyDeleteHave been looking for gifts for my daughter to give to her friends at school before the holiday break and this is awesome!
Thank you